
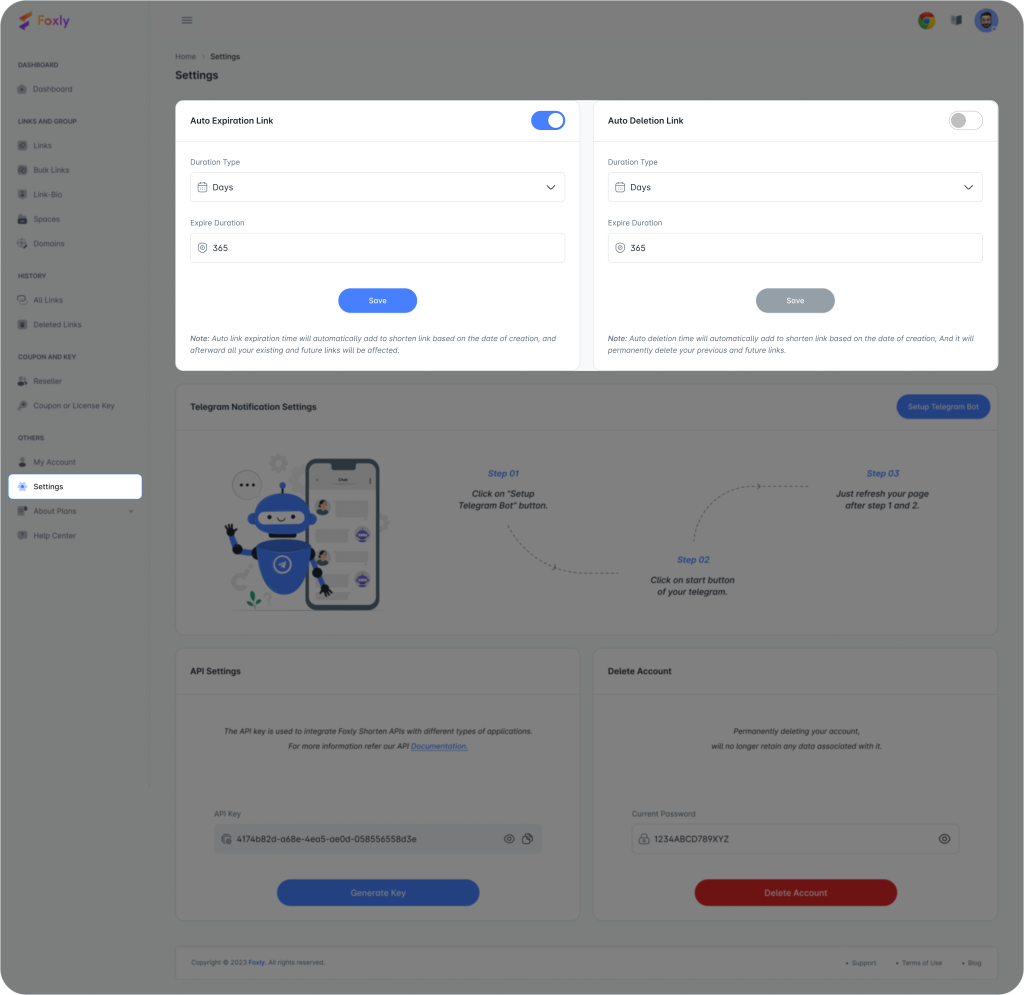
Ensuring the automatic expiration and deletion of shortened URLs is crucial for managing access and protecting your shared content. Here’s a step-wise guide to configure these settings
Step 1: Accessing Configuration Settings: #
Click on “Settings” to initiate the configuration process for shortened URLs. This configuration will directly impact all previous and upcoming shortened URLs.
Step 2: Setting Expiration Parameters: #
Choose the desired options for status change, duration type, and expiration duration in the auto-expiration link section. Read the highlighted note at the Bottom for better understanding, and follow the procedure as directed to ensure accurate configuration.
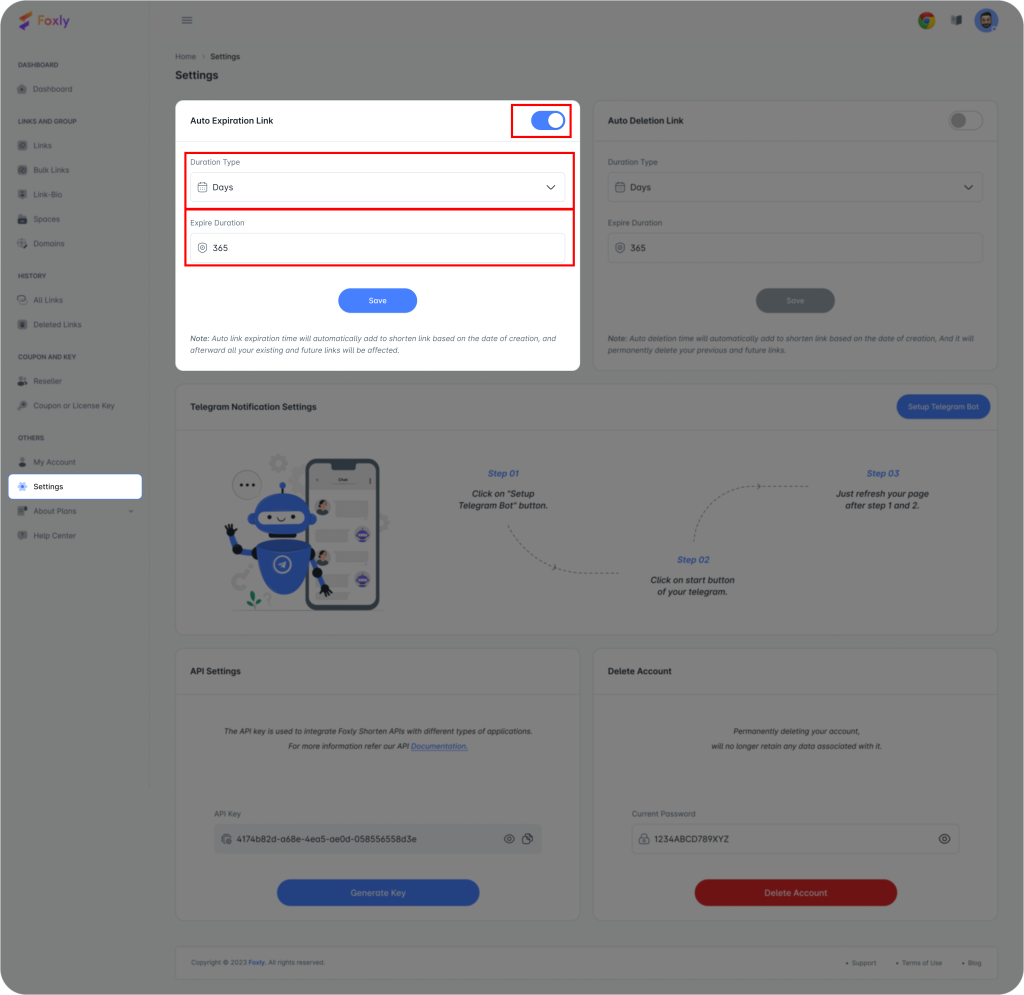
Step 3: Adjusting Status Change: #
Toggle the switch ON to activate the duration setting or OFF to deactivate it. This setting determines whether the URL will expire automatically.
Step 4: Selecting Duration Type: #
Choose whether the expiration duration is based on days or months. This selection defines the time unit for the countdown.
Step 5: Setting Expiration Duration: #
Select the numeric value for how often you want the countdown for the shortened URL expiration to occur.
Step 6: Confirming Expiration: #
Click on “Save” to confirm and save the configured settings.
Step 1: Configuring Deletion Settings: #
The settings for deletion mirror those of the auto-expire link. Adjust “Change Status,” “Duration Type,” and “Delete Duration” as needed.
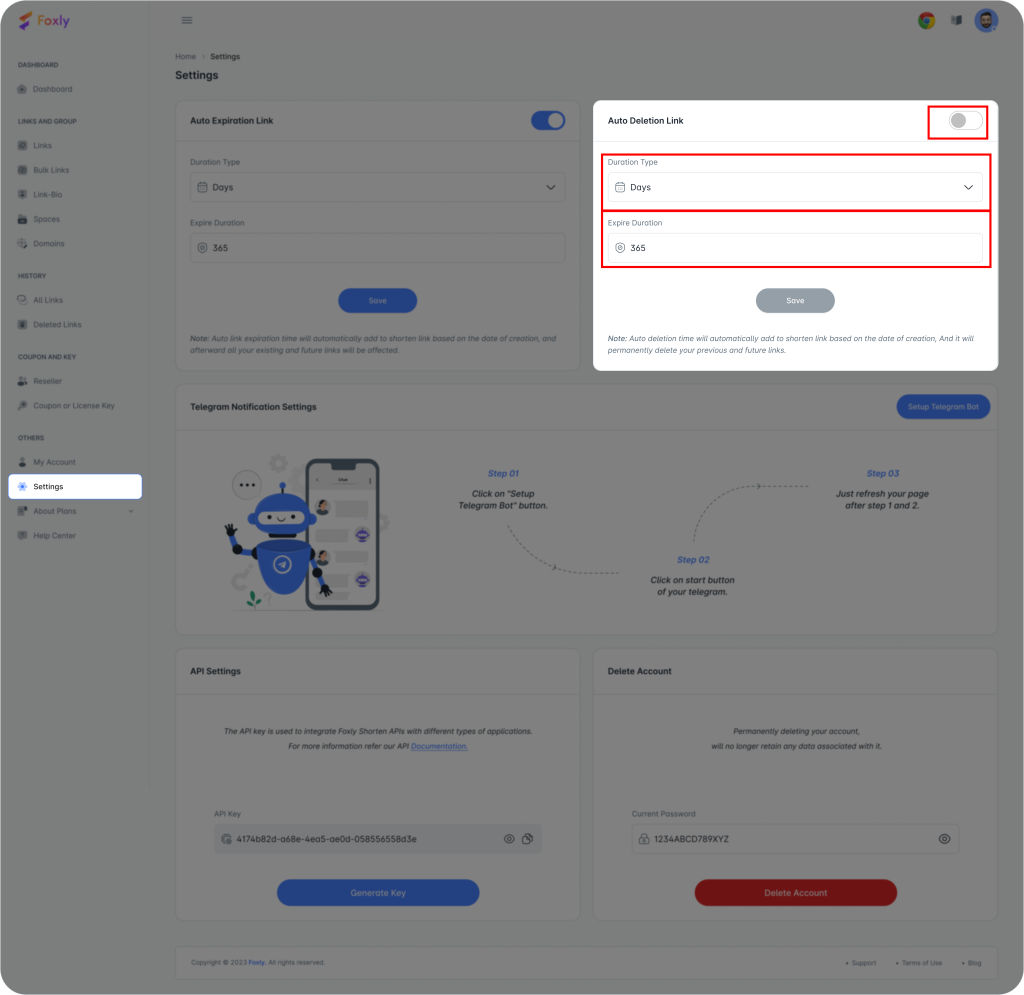
Step 2: Deactivating Deletion: #
Toggle the switch ON if you want to set the deletion duration or OFF to disable it.
Step 3: Selecting Deletion Duration Type: #
Choose the time unit for the deletion countdown (days or months).
Step 4: Setting Deletion Duration: #
Set the numeric value for how often you want the countdown for URL deletion to occur.
Step 5: Finalizing Deletion: #
Click on “Save” to confirm and save the configured deletion settings.
By following these steps, you can automatically expire and delete your shortened URLs based on your specified parameters. For example, you can limit access to a file for 365 days, after which access will be automatically revoked. Now you can securely share your links with confidence.
For any additional assistance, connect with our support team through this email.


