Welcome to Foxly Spaces, where digital clutter meets its match. Efficiently organize your URLs with our Spaces feature, simplifying your online experience. Follow this step-by-step guide to make the most out of Foxly Spaces.
Step 1: Login and Access Spaces
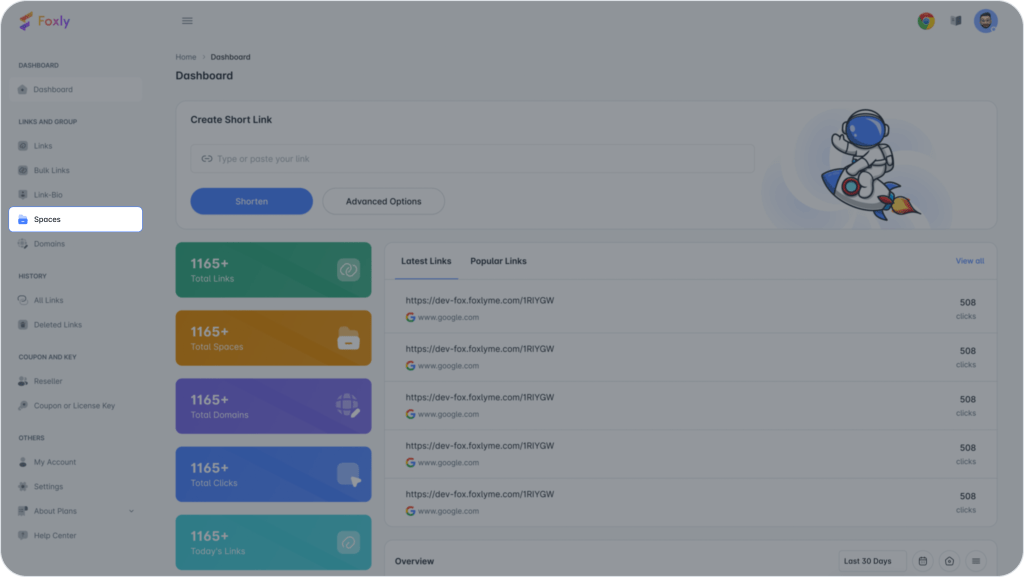
Ensure you are logged into your Foxly account. If you’re new, create an account following our page instructions. Next, click on “Spaces” in the left column menu bar.
Step 2: Creating a New Space
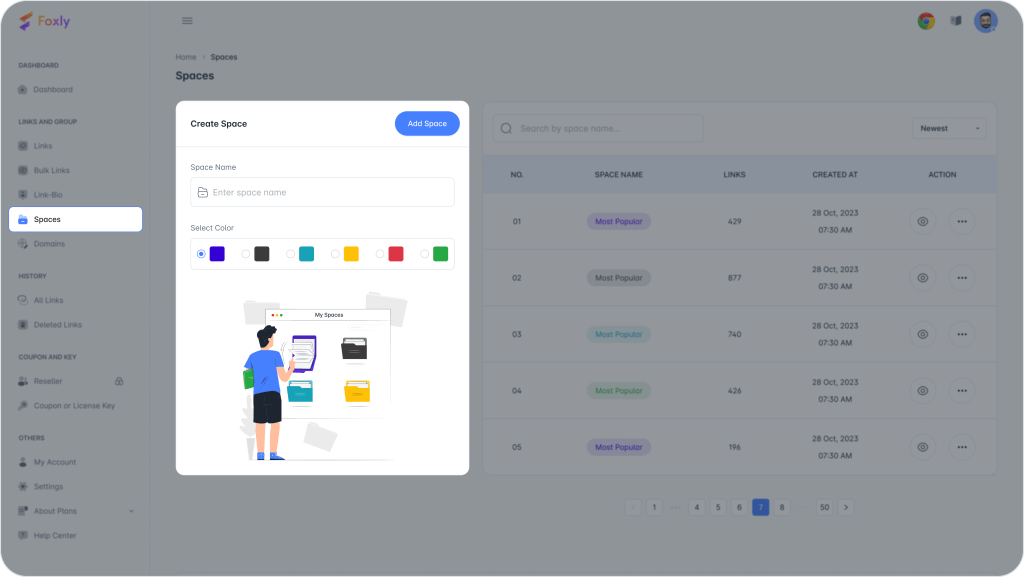
To create a new space, click “Create” in the top right corner. Set a unique name and color for reference, and then click “Add.”
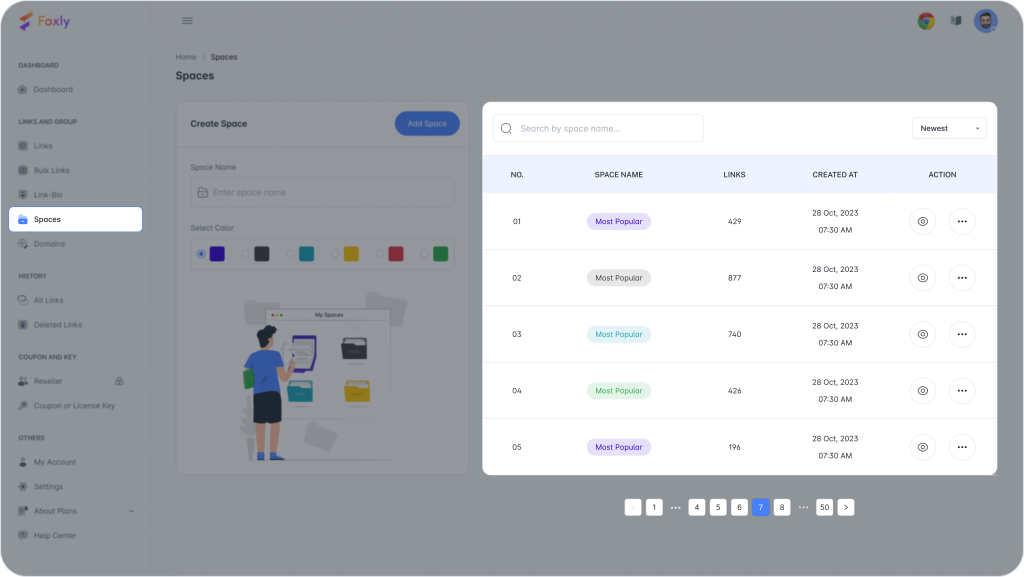
Example Use: Imagine an online seller managing multiple platforms like Amazon, Flipkart, Etsy, etc. Spaces help keep URLs organized for each platform. After creating a space, click the eye symbol (👁️) to view details and make changes.
Step 3: Managing URLs in Spaces
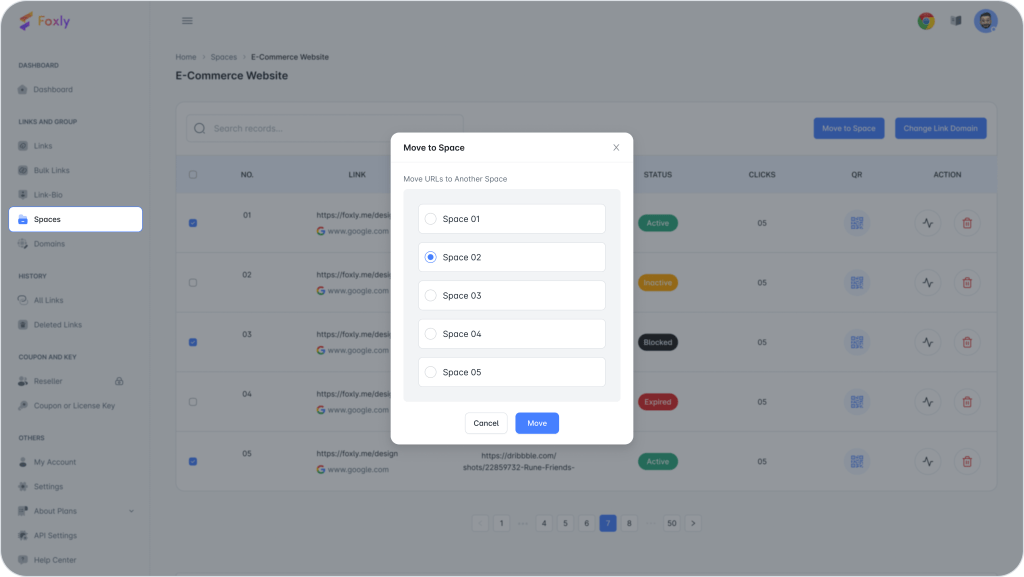
Move to Space: To relocate a URL, click “Move to Space.” Select the URL, choose the destination space, and click “Move.”
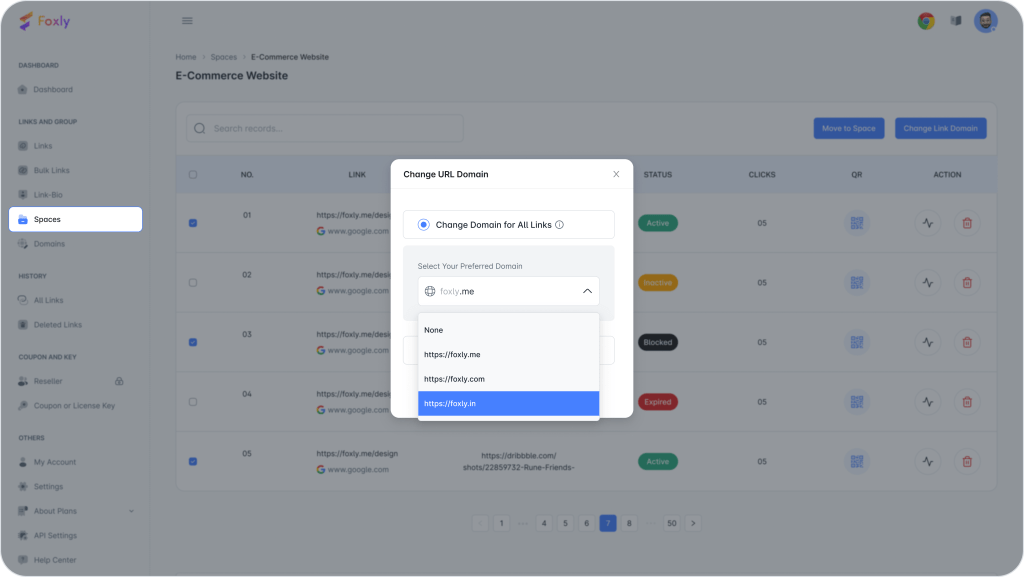
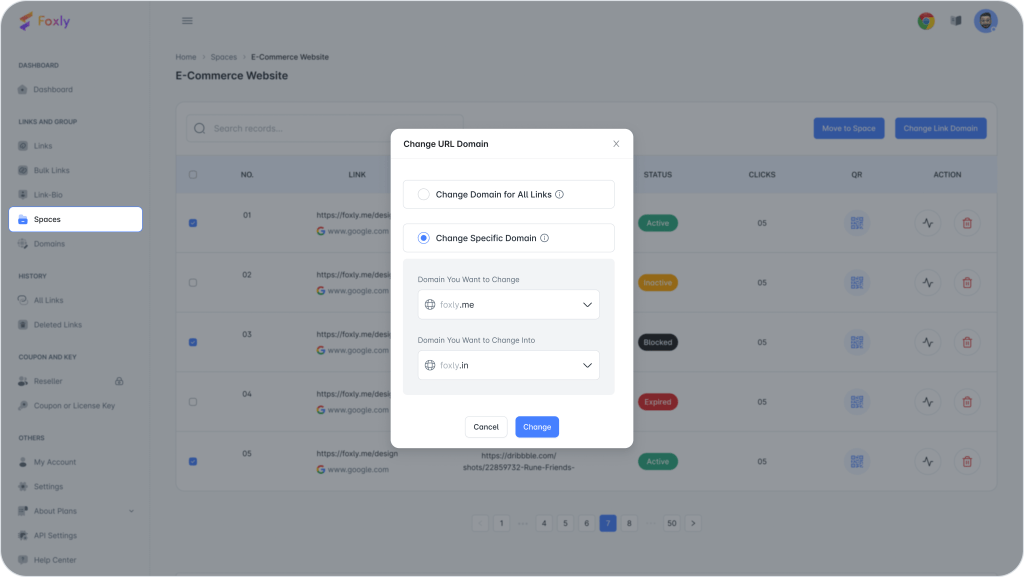
Change Link Domain: For changing link domains, you have two options.
Change for All URLs: Select the preferred domain from the drop down list and click “Change” to apply the new domain to all URLs.
Change Specific Domain: Choose the current and new domains and click “Change” for the final result.
Visualizing Changes: Witness the transformation from, for example, http://foxly.sbs/MYk7xf to http://Testthree.com/MYk7xf.
Completion: Congratulations! Your space is now a labeled haven for your URLs.
Step 4: Need Help?
If you require assistance with the Spaces feature, our support team is ready to help. Connect with us for a seamless Foxly experience.


